Thursday, September 1, 2011

One Crafty Bridal Shower

 Homemade Invitations:  I found a pack of invitations I thought I liked at Hobby Lobby, but when I opened the package I found out they were basically a blank card and a huge engagement ring to tie over it.  Being the perfectionist I am and knowing that I would not write each and every one just the way I'd like it to look, I decided to print the information onto cardstock and then add them to the orginal blank card that came with the pack.  Here are a few of the invitations I did, some with and some without the huge engagement ring overlay.  Each invitation was different; no two people received the same one.


Table Decorations:  Everything shown below I purchased and put together myself.  By the looks of it, it seems like I may have spent quite a bit of money, but actually with the help of Goodwill, some great Etsy finds, and just some candy and flowers, I managed to create all of this even with my limited budget.
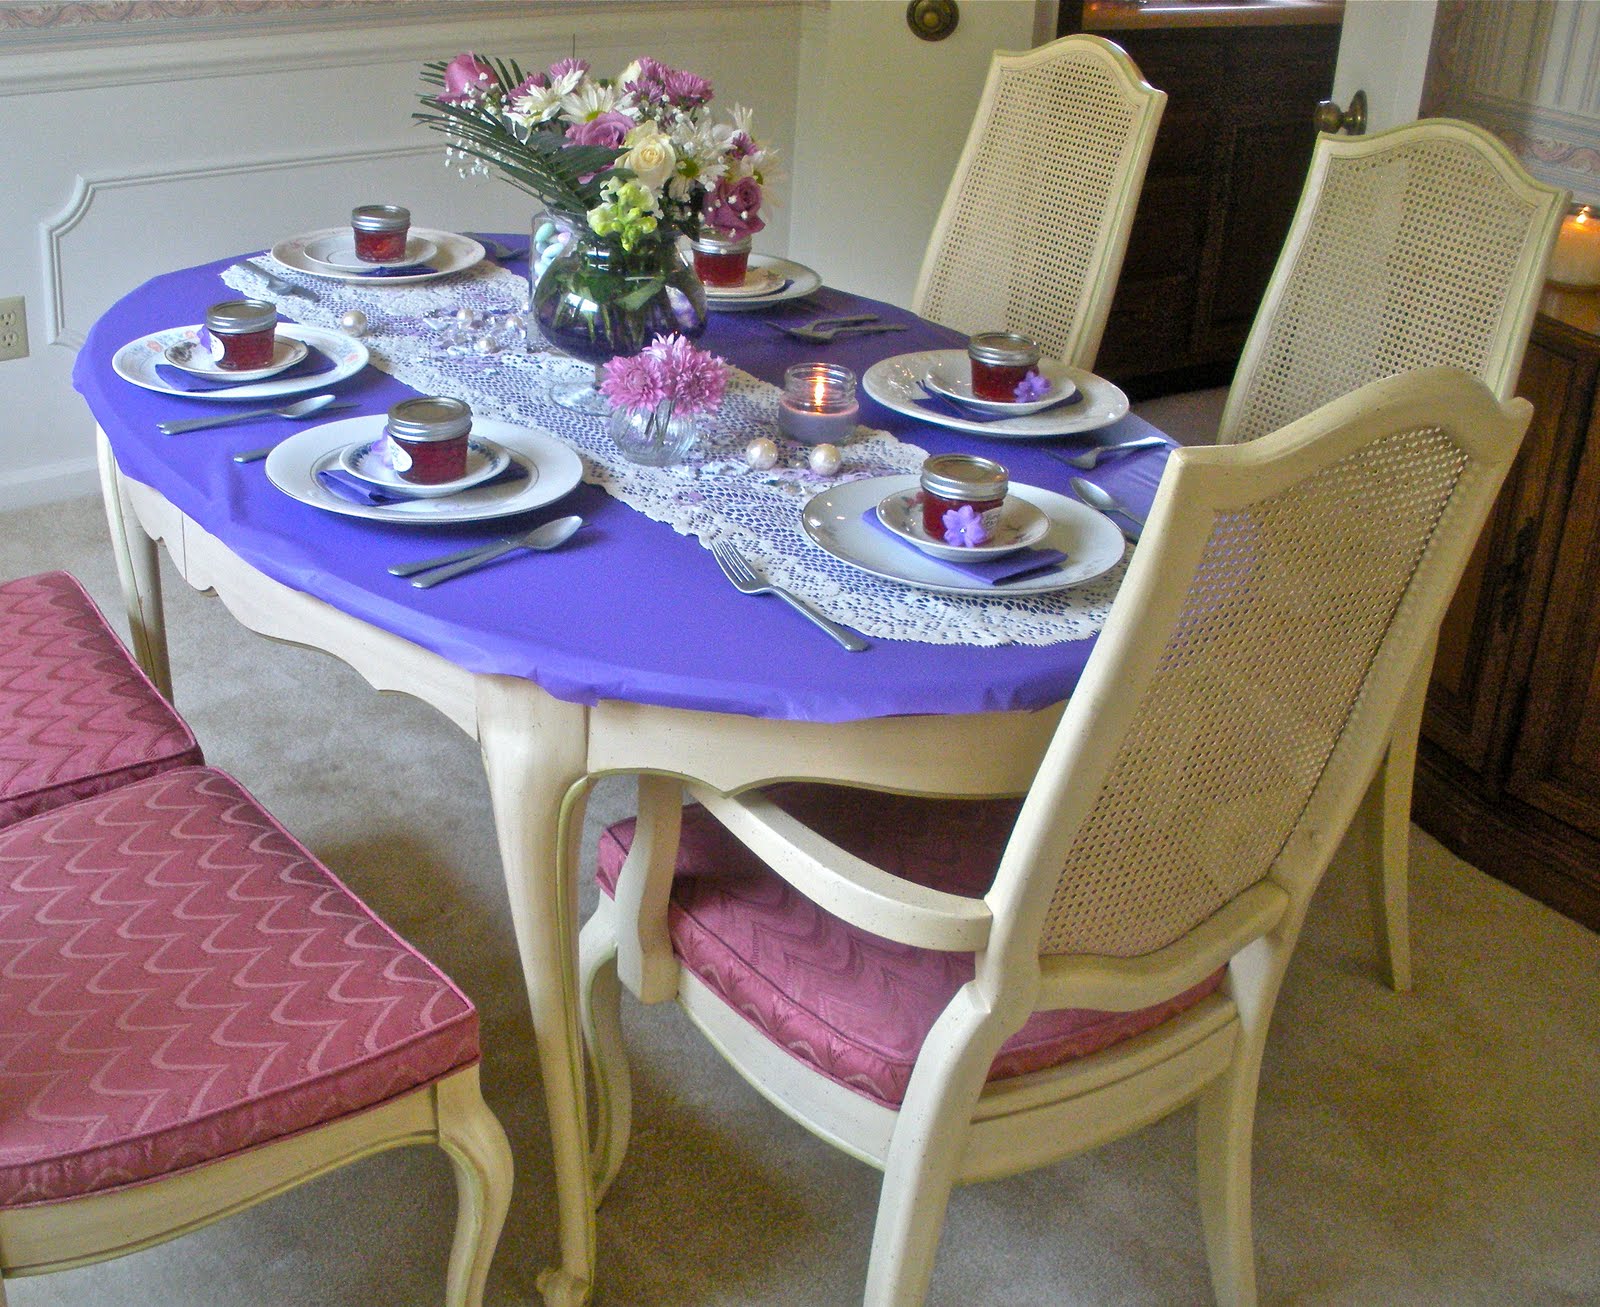
     All the china I purchased from Goodwill, along with a variety of small vases.  I mostly went to different store locations on the days they had 50% off sales on the entire store.  You can check out when these sales are on the Goodwill website.
     Another good find that I ran across on Etsy was the homemade confetti and engagement ring banner from GFetti.  Then I just mixed in some loose pearls and clear diamonds to add some sparkle to the tables.


Cupcakes:  Although my sister and I did not make the cupcakes, we sure did a good job at the presentation.  We just used tiered cake servers and stacked them.  We then added a little bit of the confetti and accents to add a little bit of "pop" to their look.  (and let me tell you, these cupcakes were absolutely amazing!)


Strawberry Jam Bridal Shower Favors:  I really wanted to do something unique for the shower favors.  Luckily, a few months before the shower my future sister-in-law offered to help teach me how to jam since I had shown an interest to it.  This is when I came up with the idea to can 4oz jars to pass out for the flavors at the shower.  I was extremely happy with how the jam and the jars came out.  Plus, they looked so cute on the tables with all the assorted china.


Gift Wrapping:  One of my favorite ways to be creative is through gift wrapping.  These are just a couple of examples of gifts I wrapped for the shower.  The bottom picture is the shower favors that I gave to the two flower girls which were purple sparkly hair pins.


I couldn't have been happier with all my hard work.  The shower looked amazing and everyone had a great time.  I even heard several guests tell me later that they literally ate the jam right out of the jar with a spoon. :)  With some planning and good family support/help, anyone can manage to pull off an unique party to their liking.  All the time and effort adds even more meaning to an already meaningful event to share with loved ones.


Tuesday, August 9, 2011

Living Chic and Cheap; Redone Mini Guest Dresser

Just a week ago, my finance and I moved from Indiana to Tampa.  We decided to get a two bedroom apartment so that family and friends can visit as often as possible.  Unfortunately, we only had a bed for the room - and a budget.  While doing some thrifting at a local Goodwill Superstore (the Goodwills are amazing here by the way), we found a small wooden night stand for $15.  We thought would be perfect for a small dresser in the guestroom.  But for those who don't know, I am extremely OCD and anal about how things look together in a room, so I decided to redo the bed and new dresser to match.  Here's how the dresser looked when we got it:
I decided to decorate the room with different shaded of yellow, with white accounts.  Through my obsession with reading crafting blogs, I came up with the idea to use wallpaper brushed with Mod-Podge to line the shelves.  Before I could go shopping for the perfect wallpaper design, I found an atlas poster during another thrifting trip and decided to use it inside.  To tie the dresser into the rest of the room, I chose to use two different shades of yellow.  

While working on this project, my finance and I discovered a night stand for $10 and decided to make matching pieces.  That blog will be coming soon, along with the results of the rest of the room.
Thanks goes out to my mom and dad for giving me the set of three wicker baskets and to my late grandpa Don, who's atlas was shown in the pictures.

Monday, August 8, 2011

Upcycling: Antique Desk Made into Desk

     I cannot believe how quickly this summer has gone, but then again, when I think about it, I can.  Working at the Marion County Superior Courts Probation Department for my internship 40+ hours a week for a 10 week period as well as planning the big move to Tampa took up a lot of time!  Although the summer thus far has been a little too fast paced and stressful, I at least can say that I thoroughly enjoyed my time with the specialized sex crimes unit I interned with and not a second of my time was wasted.  I built some incredible relationships with some amazing individuals while learning about the field in which I am now determined to work in one day.  From the experience I gained confidence, determination, and a more defined direction towards a career.  
As of right now, I am currently sitting in my new patio in Tampa!  The search for the right place was rough (at times I didn't think I'd make it through), but I'm extremely happy to say that I love our new home.  I will have a lot of new, fun posts coming soon with all the projects I've been working on to decorate.  But until I get those finished, let me tell you about a project I did earlier this summer but didn't have the time to post about at the time.
     One day a friend of mine was telling me about this amazing skeleton key antique door she had been storing in her garage for years.  It had been her grandfather's so she wanted to keep it but since it was so large and heavy, it was a pain to keep moving it around in the garage, and it always seemed to be in the way.  This same friend had previously told me she was thinking about redecorating her office with a rustic beach theme, so I connected the two together and came up with the idea to make an office desk using the antique door.  I had seen some pictures of how people have upcycled doors into furniture on craft blogs and thought I could easily come up with my own design.  My friend loved the idea and together we created something unique and meaningful to add to her home.  
      My first thought for the design of the desk was to purchase a used, cheap piece of furniture and remove the legs to use for the desk.  But after seeing the antique door for the first time and realizing how large and heavy it was, I knew my idea had a lot of possible issues with it.  Then, she showed me two short bookcases she had in the closet of her office.  After considering our options and calculating the measurements of the bookcases, we finally came up with a design.  Next all we had to do was make it come together.
     The two short bookcases were originally brown and were made out of a plastic like material was made to look like wood.  The door was already white with five panels trimmed in baby blue and we loved the look of it so much that we designed the room around it.  We purchased white spray-paint for plastic materials and went to work on the bookcases.  But before we started painting we removed the back panel of the bookcases and later covered them in a heavy fabric before nailing them back into place.  To create a smooth surface for the desk, we  purchased cuts of glass and inserted them into the five panels of the door.  To add a finishing touch to the desk, I made some cute seashell curtains to add to the beach theme of the room.  We still had some spray-paint left after the desk was finished so we purchased some old wall shelves from Goodwill and painted them to add to the room as well.
     It was a lot of fun designing and creating this desk with my friend.  We definitely made some great memories along with creating a desk out of materials she already had.  I can't wait to start a new project like this one and I'm already surfing the Internet for ideas and inspiration.  I just love summer projects!


This shelf was originally a bronze metal
color, but with some
white spray paint it fit right in to the
theme of the office.


Tuesday, May 24, 2011

Hand-stitched Ladybug Cards & Envelopes

I was so inspired by the hand-stitched thank you cards and homemade envelopes I made for Chris that immediately after I finished them, I started developing ideas for my next set.  Since Mother's Day was just around the corner (3 days away), and my mom loves ladybugs, I decided it would be perfect to make her a ladybug-themed set of hand-stitched cards.  
It wasn't until after I spent at least an hour coming up with the four designs and began the stitching process that I realized it was going to be a miracle to get them done in time.  It was already late in the afternoon on Friday, and Saturday was already packed full of events for Chris's graduation - where was I going to find the time?  First, I considered making my designs simpler to cut down on the time, but it was too late, I was already invested in the project and I knew I would never be satisfied with the final product if I cut corners along the way.  Then I considered only making two cards, but who has ever seen cards come in twos?  I HAD to at least make four, that's just stationary rules!  Plus, the thought of my mom's face when she would see the gift made me want to finish the cards in time that much more.  That's when I knew what I had to do, something that being an over-concerned college student has made me a professional at: pulling an all-nighter.  I just hoped that would be enough time!!!
But being the all-nighter pro that I am, I finished the gift at 7:30 a.m., and with plenty of time to shower and be ready for Chris's commencement at 10:00.  Even though I had some sleepy spells throughout Saturday (one of which was during dinner when I almost fell asleep on my and Chris's family, opps!), the feeling of accomplishment along with the excitement of giving the gift was so worth every second of that all-nighter. This feeling is exactly what made me feel in love with art, crafting, designing, and anything that involves creativity.


A view of all four blank cards.  I didn't have a good picture of the inside of the cards, but some had ladybug stamps in the corners, while others had more decorative paper to write a message on.
I even printed ladybug patterns to use for the envelopes.  They were lined with matching decorative paper and stitched around the top and sides in red thread.
This was my favorite of the four.  I even added some small pink beads to the middle of the flowers and used small black beads for the spots on the ladybug.  I'm so pleased with the detail I used. 

                                   
                                               All wrapped and ready to be opened!  Wrapping gifts is so much fun!
Before I had the idea of the cards, I had designed and ordered stamps with a family photo on them to give my mom.  It is almost ironic how well the two gifts went together.  I didn't want the stamps to get bent or thorn, so i decorated a manilla envelop with ladybug fabric, stamps, red ribbon, and a fabric covered button.
Here are some links to coloring pages which I used as patterns:  Ladybug on Single Leaf, Variety of Ladybugs in Different Sizes, Colored Ladybug Pattern used for Envelope.